1.安装 apt-get install pure-ftpd 2.建立ftp目录 /var/ftp/public 3.建立ftp用户组 groupadd ftpgroup 4.建立ftp非系统用户 useradd ftpuser -d /var/ftp/public -G ftpgroup -s /bin/false 5.创建pur-ftpd登录用户 pure-pw useradd ftp1 -u ftpuser -g ftpgroup -d /var/ftp/public 6.更新pur-ftpd用户信息 pure-pw mkdb 7.在/etc/pure-ftpd/auth下,创建一个软链接 ln -s /etc/pure-ftpd/conf/PureDB 60puredb 8.重新启动pure-ftpd 1 sudo /etc/init.d/pure-ftpd restart 9.附加pure-ftpd配置文件信息(在/etc/pure-ftpd/conf 添加) 1 2 3 4 5 6 7 8 9 10 11 12 13 14 15 16 17 18 19 20 21 22 23 24 25 26 27 28 […]
Month: July 2020
For added security, you can tell all clients to always use https, even if there is an http link from somewhere. HSTS will silently change the request to use https without needing to be asked, so at no point is http ever used (except on the first attempt, where the browser is given the header, […]
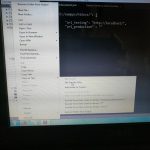
在mac终端先cd对应目录,然后执行以下命令,目录下会多了一些jpg格式的图片。 for i in *.CR2; do sips -s format jpeg $i --out "${i%.*}.jpg"; done unrar e test.rar 这条命令是将test.rar中的所有文件解压出来 也可以用 rar e test.rar
把jie用户添加到root用户组 sudo usermod -a -G root -s /bin/bash jie 把jie用户从root用户组删除 sudo gpasswd -d jie root
这篇文章主要介绍了在Ubuntu 18.04上安装PHP 7.3 7.2和7.0的方法,非常不错,具有一定的参考借鉴价值,需要的朋友可以参考下 PHP 7.3是PHP的最新版本,如果你想装指定版本的PHP,这篇文章对你有很大的帮助。本文将帮助你在Ubuntu 18.04,16.04上通过PPA的方式安装PHP 7.3 7.2和7.0。 安装PHP 7.3 通过下列命令安装PHP 7.3 1 2 3 4 $ sudo apt-get install software-properties-common $ sudo add-apt-repository ppa:ondrej/php $ sudo apt-get update $ sudo apt-get install -y php7.3 安装完成后,使用如下命令检查PHP的版本 1 2 3 4 5 $ php -v PHP 7.3.3-1+ubuntu18.04.1+deb.sury.org+1 (cli) (built: Mar 7 2019 20:31:49) ( NTS […]
一个可以替代du命令的工具,ncdu命令是对传统du命令功能上的增强,不需要像du那样输入大量的命令,就可以计算文件及目录大小并可以按照大小或文件名进行排序。它是基于ncurses库开发的,因此还支持很多丰富的交互式命令。 ncdu 1.14 ~ Use the arrow keys to navigate, press ? for help --- /root --------------------------------------------------------- 12.0 KiB [##########] .bash_history 12.0 KiB [##########] /.ssh 8.0 KiB [###### ] .viminfo 4.0 KiB [### ] anaconda-ks.cfg 4.0 KiB [### ] .bashrc 4.0 KiB [### ] .bash_profile 4.0 KiB [### […]
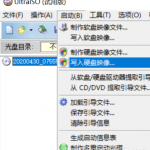
在上一次我进行了systemback的安装的使用,并将一个接近40G的文件拷贝到虚拟机中,具体的做法分为以下几步: 1、在systemback中创建live system 2、解决超过4G不能生成镜像文件的问题 3、利用cdrecord生成镜像文件 4、虚拟机选择镜像文件安装 具体可参见之前博文 system备份系统和写成镜像 虚拟机安装备份系统 现在需要拷贝一份系统到U盘中,将U盘作为启动盘,对另一个电脑进行安装。 按照上一次的思路进行了如下操作: 1、在systemback中创建live system 2、解决超过4G不能生成镜像文件的问题 3、利用cdrecord生成镜像文件 4、在windows下利用软碟通Ultraio将镜像文件写入u盘/在linux下利用dd指令将镜像写入U盘 但是在安装时出现如下错误: "(initramfs) mount: mounting /dev/loop0 on //filesystem.squashfs failed: invalid argument can not mount /dev/loop0 (...) on //filesystem.squashfs" 可能表示挂载不了某个东西。 折腾许久,查了一个资料,可能是由于iso文件大于4G导致的问题,主要存在以下两种做法:谨慎测试 https://bugs.launchpad.net/ubuntu/+source/casper/+bug/1431841 https://ubuntuforums.org/showthread.php?t=2086444&page=5 第一种是更改其中的crasper-helper一个脚本,第二种方式不知道怎么做… 最后还是没能解决问题。 下方高能: 经过多次各种尝试,最后才在systemback上看见可以直接将生成的sblive文件写入U盘,作为启动盘使用!! 那我还做什么镜像文件! 可能只有安装虚拟机需要镜像吧… 方法: 在生成live备份后,在电脑上插入U盘(u盘会被格式化的),U盘空间肯定要够呗(大于sblive文件大小) 直接点击如下图操作,选择write to target,一个启动u盘就做好了,可以直接用来装系统。写入时间的长短根据文件大小来定。
本文介绍如何在Ubuntu 18.04或者Ubuntu 18.10系统上安装Systemback。 简介 Systemback是一个简单的系统备份和恢复应用程序,根据GPLv3许可条款发布。Systemback的功能包括: 创建系统备份和用户配置文件。 将系统还原到以前的状态,就像Virtualbox的快照功能一样。 从现有安装创建可启动ISO文件。 将系统从一个分区复制到另一个分区。 升级软件。 在Ubuntu 18.04系统上安装Systemback的方法 Ubuntu 16.04和14.04用户可以通过在终端中运行以下命令从PPA安装Systemback: sudo add-apt-repository ppa:nemh/systemback sudo apt update sudo apt install systemback 注:Systemback的作者在2016年停止了开发,因此Ubuntu 18.04和18.10不在支持列表中。如果你在Ubuntu 18.04上运行上述命令,将看到以下错误: E: The repository 'http://ppa.launchpad.net/nemh/systemback/ubuntu bionic Release' does not have a Release file. 或者: E: Unable to locate package systemback 要在Ubuntu 18.04或Ubuntu 18.10系统上安装systemback,首先删除PPA: sudo add-apt-repository --remove ppa:nemh/systemback […]
1. 安装Package Control 2. 利用Package Control包管理工具安装SidebarEnhancement插件 3. 右键项目->Project->Edit Preview Urls打开SideBarEnhancements.json,添加如下代码 WIN系统下的代码 { "D:/xampps/htdocs/": { "url_testing": "http://localhost/", "url_production" : "" } } 苹果Mac系统下的代码: { "/Library/WebServer/Documents/": { "url_testing": "http://localhost/", "url_production" : "" } } 图片如下 4. 点击Preferences->Package Settings->Side Bar->Key Bindings-User,打开一键绑定文件,添加如下代码 [ {"keys":["command+1"],"command":"side_bar_open_in_browser","args":{"paths":[],"type":"testing","browser":"chrome"}}, {"keys":["command+2"],"command":"side_bar_open_in_browser","args":{"paths":[],"type":"testing","browser":"Safari"}}, ] 如图